Each of these lines are self explanatory, I am using a private internal IP address in my home network but this can be use a public IP address.
Now exit the editor and we will set the hostname on the server using the following command.
hostname webserver
Now all the IP information is set we need to restart the networking service,
service network restart
Before we start installing the web server we run all the available updates,
yum update -y
iptables which is installed and enabled by default on CentOS will block the port required in this tutorial, run the following command to disable the firewall.
service iptables save

service iptables stop

chkconfig iptables off
Obviously if you are using this in a live environment you wouldn't simply disable the firewall but you will open the required ports.
Apache is the most popular open source web server used on the internet.
Installing Apache is very simple and can be completed in a few minutes by running the following command.
yum install httpd -y
We then need to start the apache server by running the following command
service httpd start
To make this service automatically start every time the server is booted run the following command
chkconfig httpd on
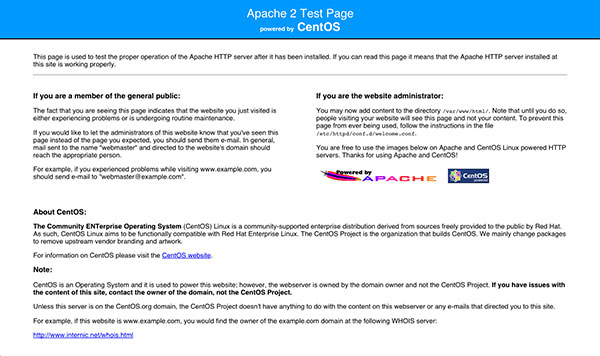
To check apache has successfully installed and started you can check this in your browser by typing in your servers IP address.
You should see a "It Works!" page be shown as in the screenshot below.
MySQL is the world's most popular open source database, to install it run the following command.
yum install mysql-server -y
As with the apache server we want to start this service and make sure it starts automatically on boot.
service mysqld start

chkconfig mysqld on
Once this is complete run the following script to secure MySQL
/usr/bin/mysql_secure_installation
This will prompt you to enter the current password for root, as this has just been installed the password will be blank so hit the return/enter key.
You will now be prompted to set a root password, "Y" here is the default so hit the return/enter key to set one.
Once a MySQL root password has been set you will receive a series of questions to secure the install, the defaults are the most secure so hit the return/enter key for all of these.
In order to log into MySQL to secure it, we'll need the current
password for the root user. If you've just installed MySQL, and
you haven't set the root password yet, the password will be blank,
so you should just press enter here.
Enter current password for root (enter for none):
OK, successfully used password, moving on...
Setting the root password ensures that nobody can log into the MySQL
root user without the proper authorisation.
Set root password? [Y/n]
New password:
Re-enter new password:
Password updated successfully!
Reloading privilege tables..
... Success!
By default, a MySQL installation has an anonymous user, allowing anyone
to log into MySQL without having to have a user account created for
them. This is intended only for testing, and to make the installation
go a bit smoother. You should remove them before moving into a
production environment.
Remove anonymous users? [Y/n]
... Success!
Normally, root should only be allowed to connect from 'localhost'. This
ensures that someone cannot guess at the root password from the network.
Disallow root login remotely? [Y/n]
... Success!
By default, MySQL comes with a database named 'test' that anyone can
access. This is also intended only for testing, and should be removed
before moving into a production environment.
Remove test database and access to it? [Y/n]
- Dropping test database...
... Success!
- Removing privileges on test database...
... Success!
Reloading the privilege tables will ensure that all changes made so far
will take effect immediately.
Reload privilege tables now? [Y/n]
... Success!
Cleaning up...
All done! If you've completed all of the above steps, your MySQL
installation should now be secure.
Thanks for using MySQL!
PHP is a server-side scripting language designed for web development but also used as a general-purpose programming language.
To install PHP run the following command.
yum install php php-mysql -y
PHP also has a variety of modules that you can add onto your server. You can see the ones available by typing.
yum search php-
And example output from the following command would be
php-cli.x86_64 : Command-line interface for PHP
php-common.x86_64 : Common files for PHP
php-gd.x86_64 : A module for PHP applications for using the gd graphics library
php-pdo.x86_64 : A database access abstraction module for PHP applications
You can view more information about each package using yum info.
yum info modulename
If you want to install one of these modules then you can install these by running the following command.
yum install modulename
For example if you want to install the gd library you would run the following command.
yum install php-gd
Now PHP has been installed we need to restart apache.
service httpd restart
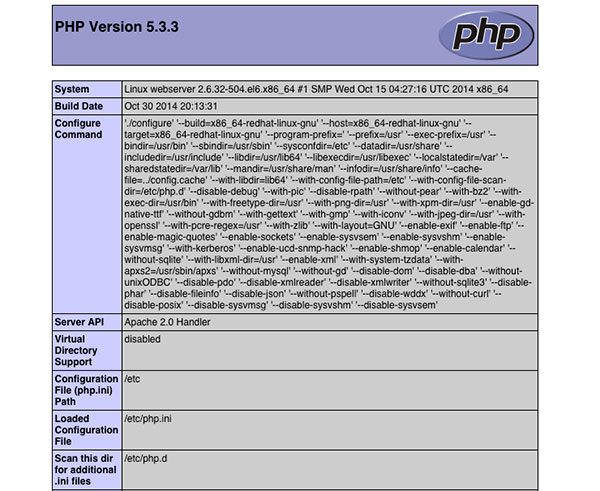
Now apache has been installed we can check PHP is working correctly by creating a PHPinfo script.
vi /var/www/html/phpinfo.php
And insert the following
phpinfo.php
<?php
phpinfo();
?>
Now visit this page in your web browser, in my case I visited https://192.168.0.210/phpinfo.php
If installed correctly you should receive a page as in the screenshot below.