How to Install and Use Unlighthouse on macOS using HomeBrew and npx


Unlighthouse lets you scan your entire website with Google Lighthouse️ with a single command.
This is an excellent tool for analysing your website’s performance, accessibility, and best practices in one go. Here's how to set it up:


Install Homebrew
First you need to install homebrew, which is a popular package manager for macOS
/bin/bash -c "$(curl -fsSL https://raw.githubusercontent.com/Homebrew/install/HEAD/install.sh)"


Install Node.js
Use Homebrew to install Node.js, which includes npm and npx
brew install node


Verify that npx is available
npx --version


Installing Unlighthouse
Running the command to scan your website will install Unlighthouse for you
npx unlighthouse --site <your-site>


Replace <your-site> with your websites URL


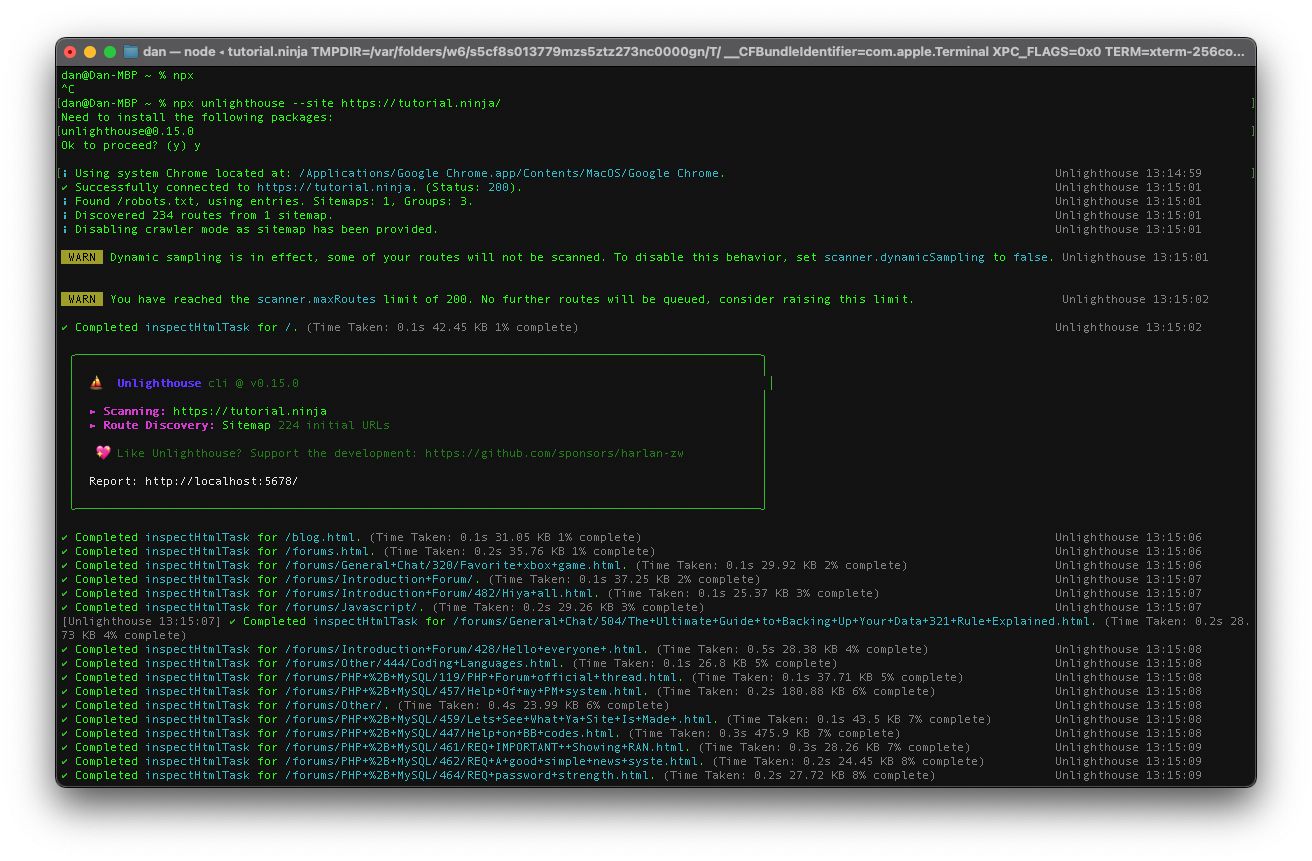
dan@Dan-MBP ~ % npx unlighthouse --site https://tutorial.ninja/
Need to install the following packages:
unlighthouse@0.15.0
Ok to proceed? (y)


Press "y" and hit return on your keyboard to install


TutorialNinja Image

This will then install Unlighthouse and perform the scan on your website.
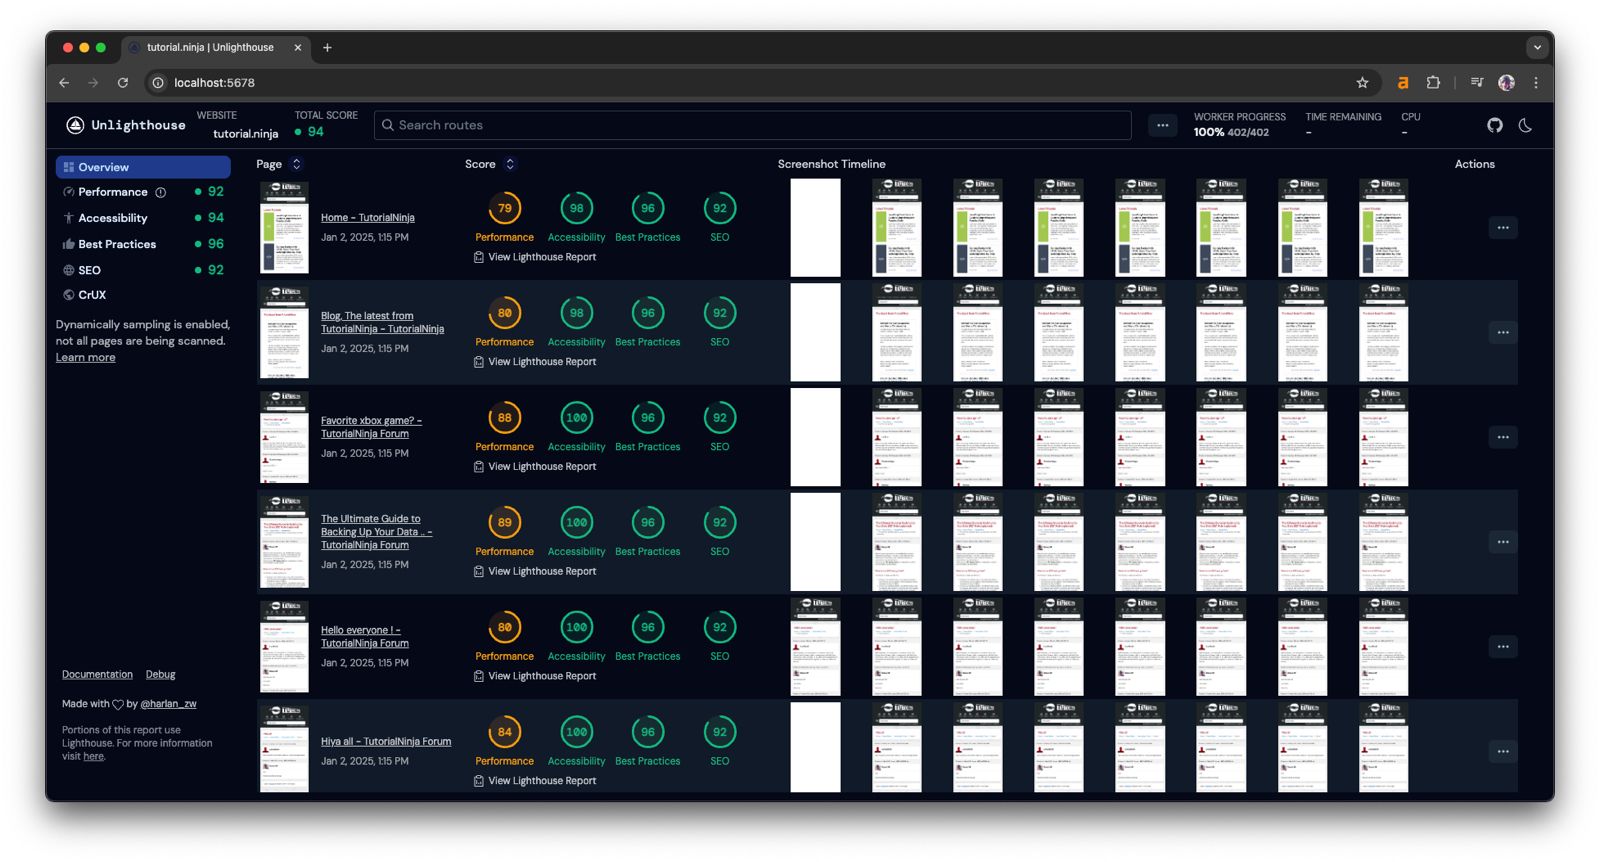
Copy the Report URL found at the top of the unlighthouse command into your web browser to view the report

TutorialNinja Image
DanielXP's Avatar
Author:
Views:
2
Rating:
There are currently no comments for this tutorial, login or register to leave one.